Puzzles Are Teaching Tools
As a teacher, there is an ongoing challenge to create meaningful scholarly activities without breaking the bank. If you’re a teacher, you get this.
I am not only an art teacher but also an Applied Behavior Analysis Therapist (ABAT) for preschoolers with special needs, and a mother to my own awesome kiddos as well. What I’ve gathered from this is that education and the drive to learn is all around us in so many different forms. Puzzles are one of them.
It’s no mystery that puzzles are a solid win for fine motor skills. They cultivate an impressive ability to observe, study and complete an activity. Even if you aren’t a fan of the more challenging puzzles, simple ones can even afford the doer the dopamine rush we all rely on as a reinforcement for finishing. Completing puzzles also provides the stimulus to want to continue, or start up another similar activity.
Thus, why I’m excited about this post.
Most of my projects don’t start out as ideas for posts. This one sort of came together in real time, therefore I don’t have a lot of pictures.
Our puzzles in class are typically board based. Since the overhead is so high to create them on my own with wood, I started thinking about my current resources.
At school, I have access to a printer and a laminator. One is a personal use, table top laminator, and the other is a larger version that can put multiple projects in at once. There are pros and cons to both but I like the small table top one the best. After doing this project for our younger crew, I would suggest completing the lamination process with that machine.
With that being said, I’ll be touching on alternatives and tricks I used while learning the larger lamination machine to create our puzzles today.
Puzzle Making with Coloring Pages
First, let’s touch on what you’ll need.
You’ll Need:
▢ Scissors
▢ Glue Stick
▢ Printer Paper (A4 is in this tutorial)
▢ Printer (For printing…)
▢ Coloring Utensils (In the event that you can’t color the pages before printing them.)
▢ TeachersPayTeachers.com Account (or access to other designs you’re looking to create puzzles with)
▢ Thermal Laminator (Personal or Industrial)
▢ Velcro (White)
**Please note that this does come as an overhead cost design in the event that you do not have access to either of these machines. The personal laminator will not come with it’s own sheets and a pack is currently not cheap for teachers on a budget like myself. **
Also, I would like to take a moment to acknowledge that this is not an affiliate links on this project. These are the items and machinery that I’ve used to complete these designs.
Now, let’s get down to business.
While scrolling through teacherspayteachers.com, I realized what our puzzles were. They are in essence, errorless teaching activities. This means that if a colored object could be a puzzle, a black and white coloring page could be too! It opened up the way that I thought about these designs all together.
Where to Find A Puzzle Design…

The first thing you’ll need to do is decide on the coloring page you want to use. You’ll need two of them, so if you’re using a coloring book for this, you will need to make a photo copy.
*If you’re printing from a web browser or a download, simply select the file and print the design twice.
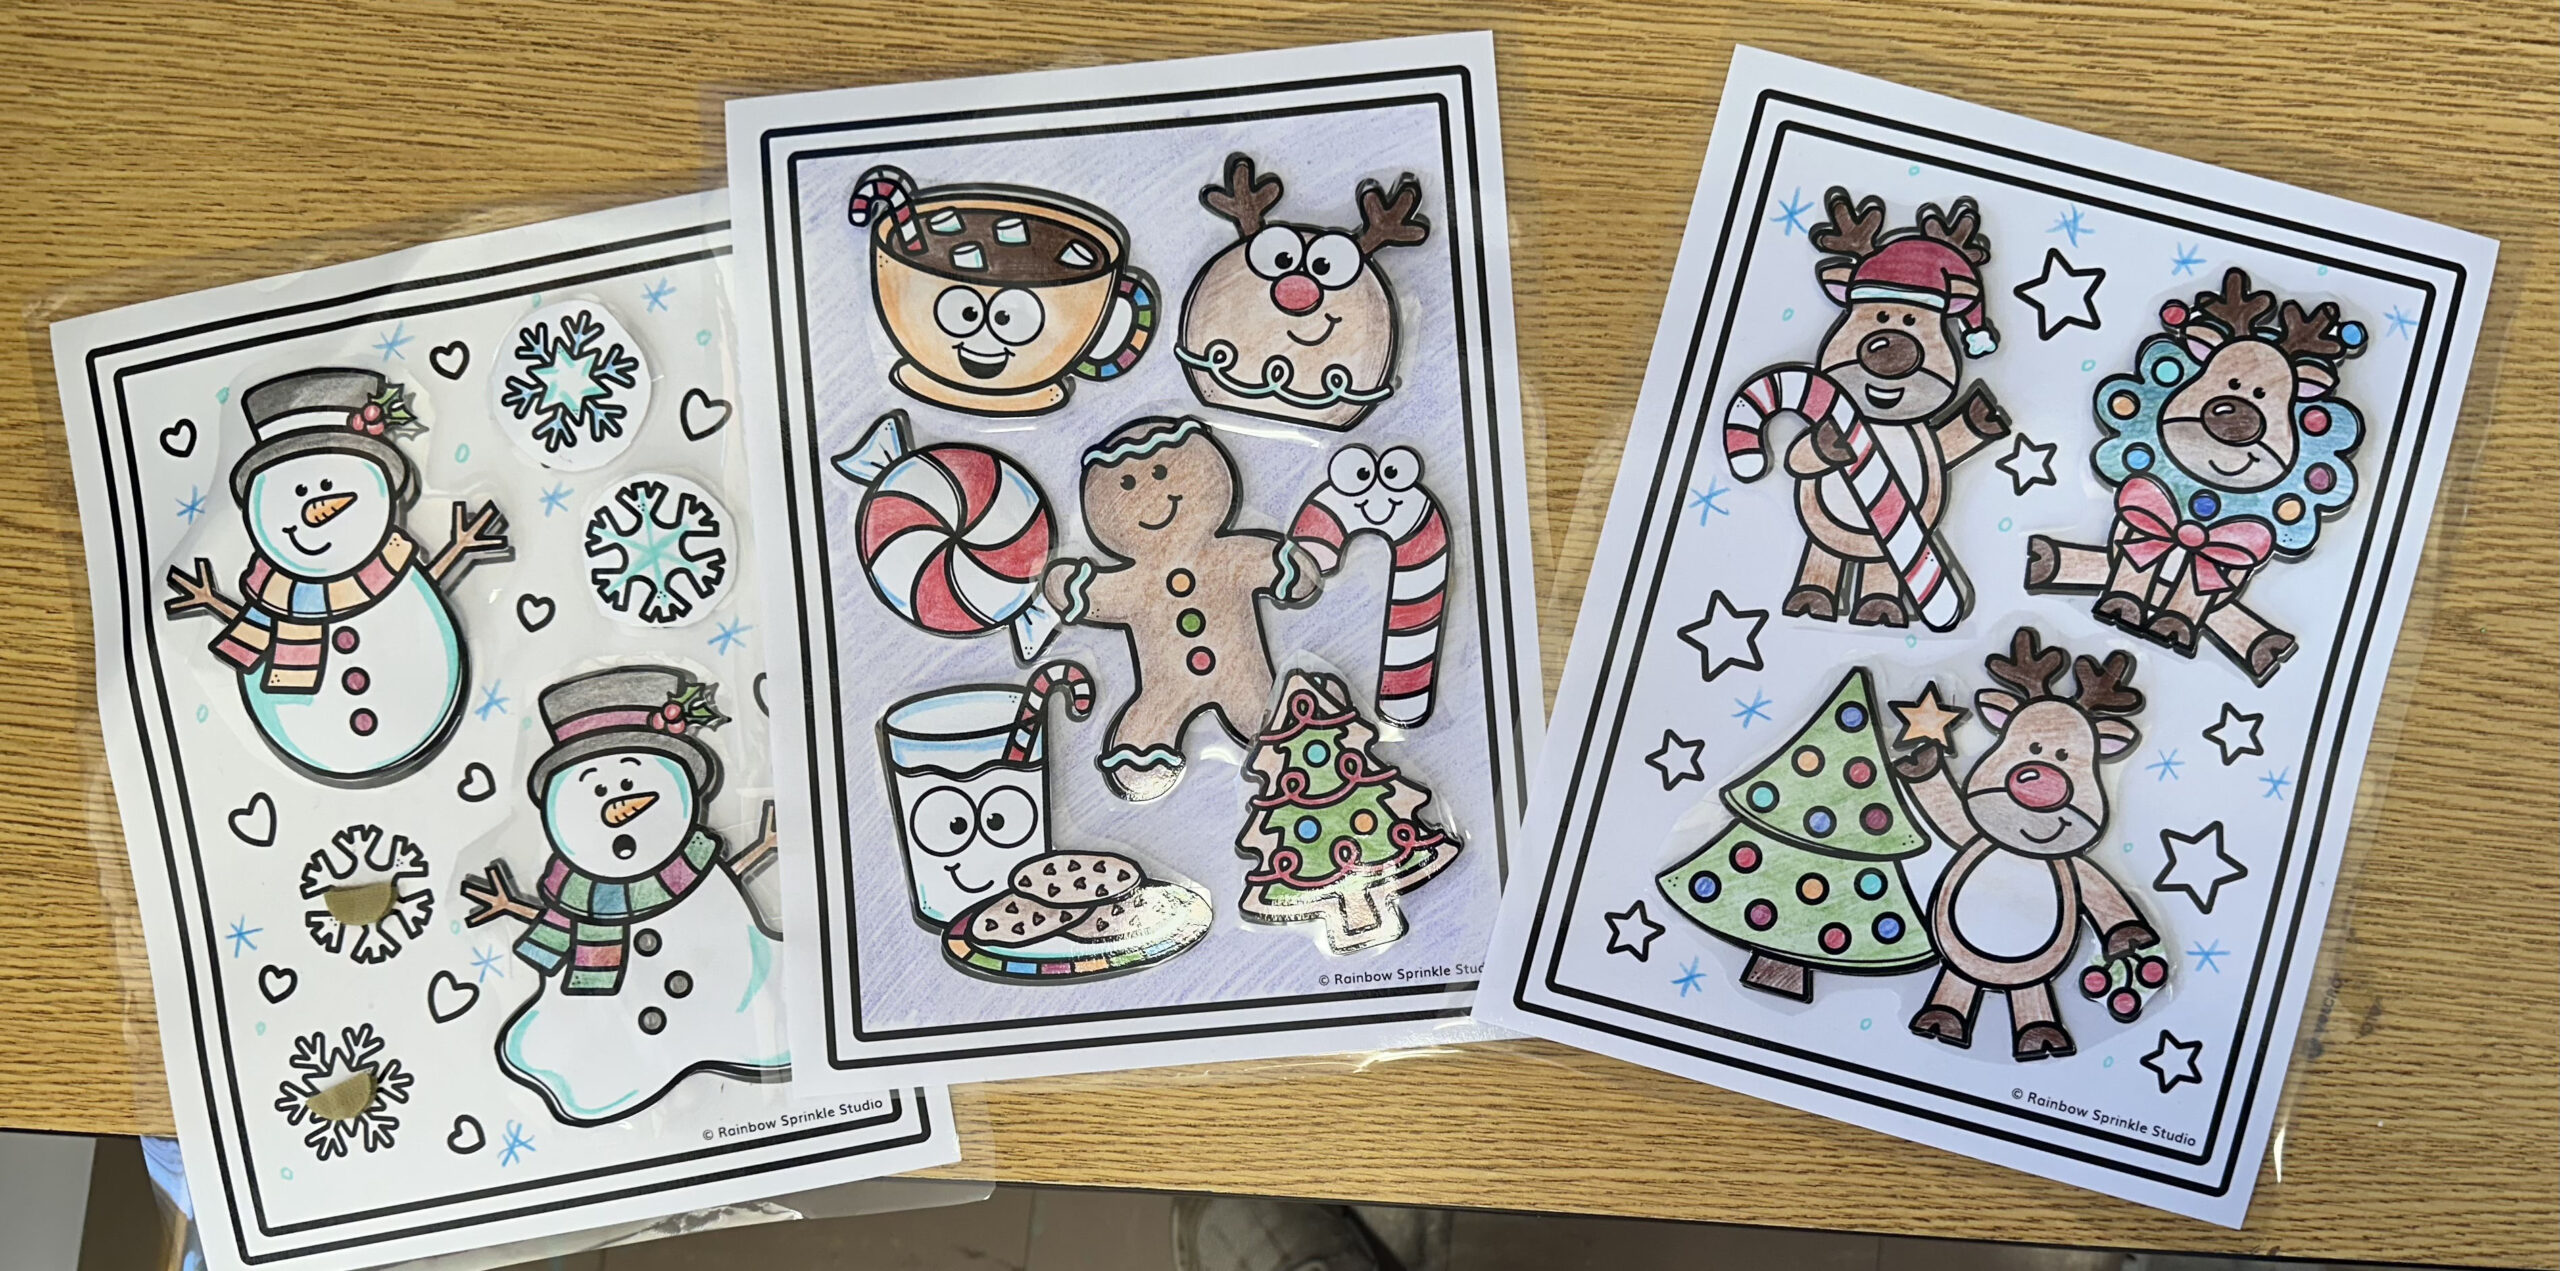
Once you have the two identical pages, decide which one is going to be considered your puzzle board. This page needs to remain intact. On mine, since they were printed as a black and white coloring page, I added colors to the free space around the images. This dedicated the free space as the board.
Next, with the page that will become your pieces, color the characters or designs you want to cut from it.
For clarity, the pieces need to keep their outlining, especially in preschool. This helps the student both target and map the image.
After the pieces have been colored and cut from the page, we’ll need to laminate them.
Tips and Tricks for the Personal Laminating Process

If you’re working with a personal laminator, remember that the positioning of your pieces and application of the thermal sheets is crucial. The board itself will take up one whole thermal sheet. The pieces, however, should not.
A trick I learned while using these in particular is to make sure there is at least a quarter of an inch around each of the pieces. Packing them in too closely will make the plastic break open around the image. Packing them too far apart will waste the sheet.
Also, a good way to make sure the pieces don’t move around is to start at the top of the opened thermal page, at the seam, and place your pieces accordingly from there. Simultaneously, lower the top sheet down onto your project as you go. Do your absolute best to pay attention to your project because the static electricity between the pages will move your pieces if you need to go back and readjust something. I have learned this one way too many times not to note it.
Pinch the sheet closed with equal pressure closer inward to ensure movement of your pieces is minimal. Line up the thermal paper with the laminator and baby that sheet until its at least half way through. If you have small pieces throughout the thermal paper, watch that page like a hawk as pieces can still move on you.
Tips and Tricks for Using A School Lamination Machine

If you’re working with the industrial sized laminator for the school that you may work for, follow the directions given to you by your building.
The one I worked with for this project was a school laminator for reference. It requires users to let it heat up for fifteen minutes which gives the user ample time to plan out their usage.
To create my puzzle boards, I sent the solid sheets through, two by two as I had multiple puzzles to work with. If you’ve used this before, you’ll notice that after they go through the roller, there is a large space of unused plastic that can be repurposed.
Once all of the puzzle boards have been sent through, pause the machine.
Here, I took the excess plastic and cut it across the width of the machine in one inch strips.
Since the laminator isn’t built to give you pieces like this, I took a glue stick, put a dab of glue on sections of the one inch strip and set the pieces along the strip. This maneuver gives the machine enough grip to roll out a line of pieces without having a major gap of wasted laminator plastic.
Once you’ve laminated all of your pieces, guide the plastic down long enough for the next user. Cut the plastic and reapply the weights to the plastic edge to be sure it won’t back up and reverse itself through the machine.
Cut Out Your Puzzle Pieces…

Now that you have your pieces, cut them out, leaving at least a quarter inch around them. Again, this is so that the plastic stays together.
How To Add The Velcro to Make Your Puzzle

In class we like to make sure that surfaces are safe. A good way to do that with our preschool crew is to make sure the soft side of the Velcro is face up on the most used item. In this case it is the puzzle board.
I cut the Velcro tape into small square pieces to ensure that it would not cover the design.
The placement of the Velcro is crucial. The student will still need to target the uncolored image, map it, and decide on where to put the colored piece. If we make it hard based on placement, it is no longer a puzzle that can help errorlessly teach the student.
Place the rough Velcro onto the soft side to ensure that the placement of the puzzle piece matches that of the other piece of Velcro. This will make sure that the piece will go where it is intended while the student is using it.
Have You Made Your Own Puzzle?
If so I would love to showcase it here!


Quick Recap: How to Make A Puzzle With Coloring Pages
You’ll need all of the above. The tips, tricks and experiences that have helped throughout this process are there too. If you just want the quick directions they’re below:
01
Pick Pictures For Puzzles
Whether they are already colored or in black and white, to be colored, either works. Just make sure you have two copies.
02
Dedicate the Pages
Decide on which page is the board and which one will be the pieces.
03
Color & Cut Out The Pieces
Make sure all pieces still have their outline. This is very important to new learners.
04
Laminate
Your puzzle needs to last for the effort you’re putting in. Decide on the right way for you, then re-cut the puzzle pieces.
05
Attach With Velcro
Cut the Velcro into manageable pieces for your students. Make sure the Velcro is added in flexible places where learning is uninterrupted.
06
Play
Your puzzle is ready to be used. Encourage your students to solve the puzzle individually by piece or finish the whole thing.
Until next time, I wish you all the best!

